Danger of the Depths Art Restoration
The original paintings used to illustrate GI Joe's packaging are some of the most memorable images to collectors, especially for those of us who remember picking out sets on toy store shelves. While there are a number of original images from both the military and Adventure Team eras still extant, they are largely locked up in a handful of private collections and inaccessible to fans. Still, it's a miracle any survive at all as they were considered ephemeral objects, made only to sell the product and then to be disposed of when their job was done. Most were painted quickly, and not always with the best materials.
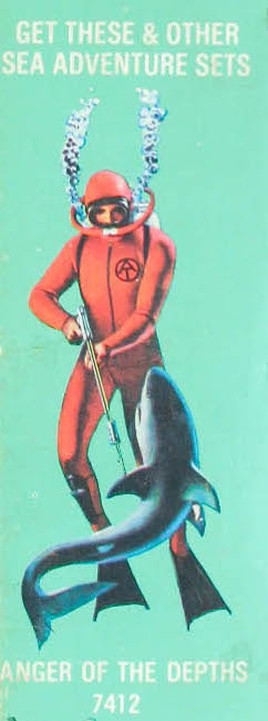
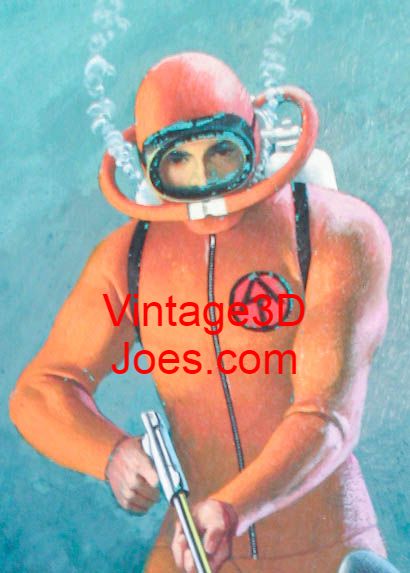
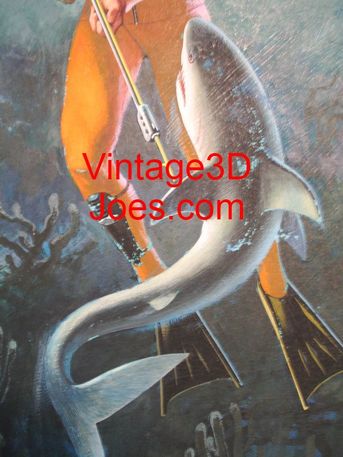
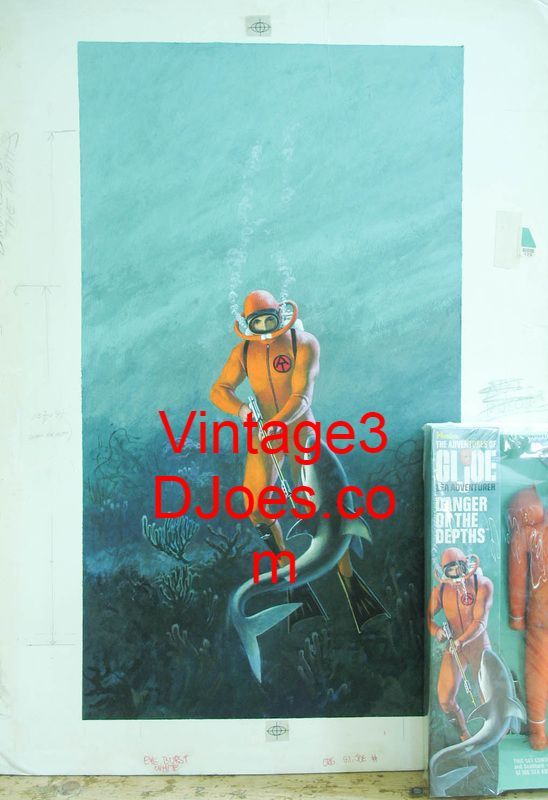
This last point is certainly true when considering the original art for Danger of the Depths. Shown below in it's original state, it can tell us a lot about the process used to create GI Joe's image in 1970. Note the chipping of the black paint around the mask, AT symbol, knife and on the shark. This is not just the result of rough handling over the years. The artist painted the black details in a water based gouache over an incompatible base coat of oil paint. While this held together (mostly, see pics below) for the amount of time it took to get pictures taken for the window box, the incompatibility led to chipping over time. This wan't helped by the loss of the arts original paper protector, a fragment of which was retained as seen on the top left of the image.
This last point is certainly true when considering the original art for Danger of the Depths. Shown below in it's original state, it can tell us a lot about the process used to create GI Joe's image in 1970. Note the chipping of the black paint around the mask, AT symbol, knife and on the shark. This is not just the result of rough handling over the years. The artist painted the black details in a water based gouache over an incompatible base coat of oil paint. While this held together (mostly, see pics below) for the amount of time it took to get pictures taken for the window box, the incompatibility led to chipping over time. This wan't helped by the loss of the arts original paper protector, a fragment of which was retained as seen on the top left of the image.
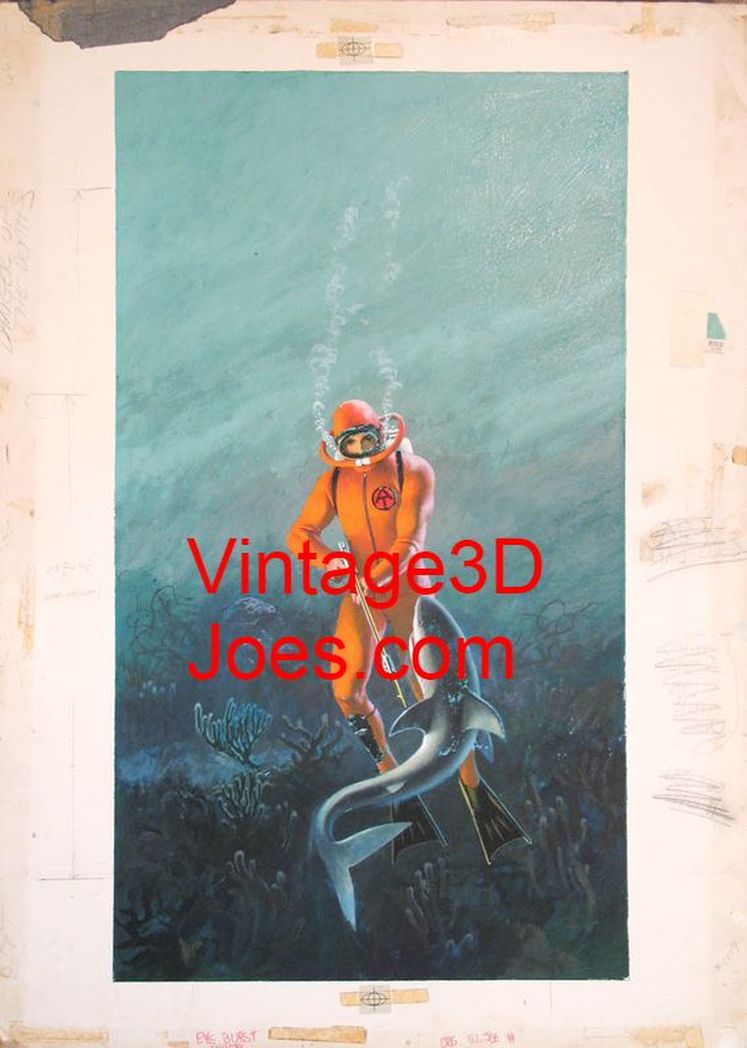
Above, the art in its original 'as-found' condition
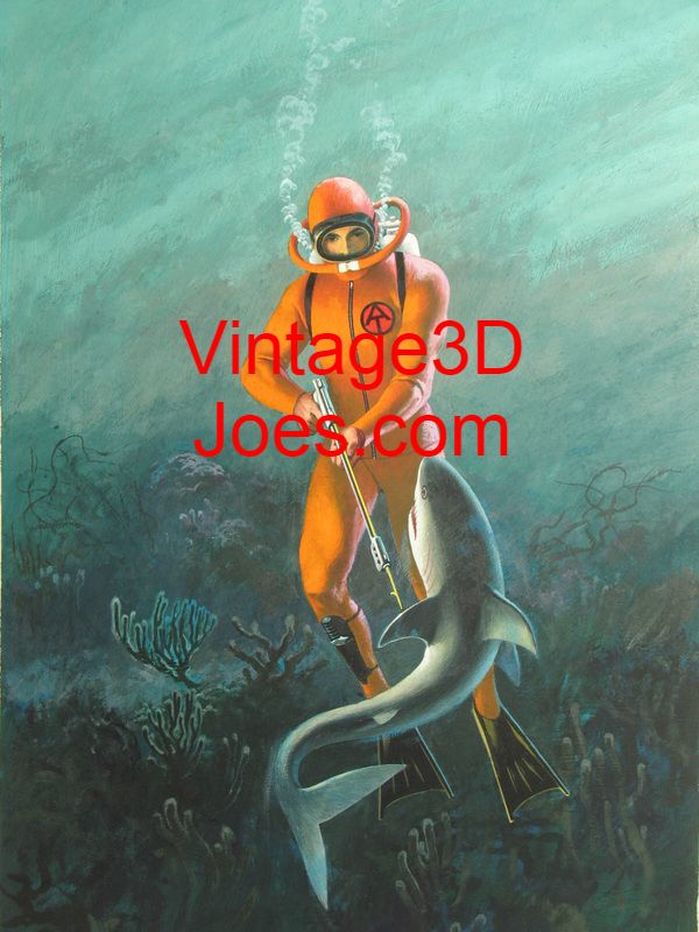
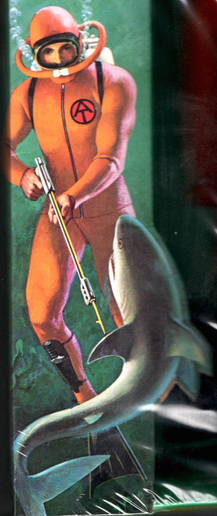
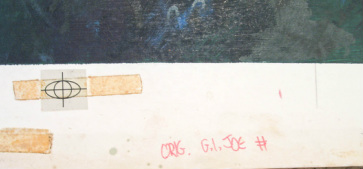
Above, the art as printed on the box. To the right, a detail. note that the black paint on the edge of the face mask, at the right corner of the cheek, and on the edge of the AT logo had already begun to chip off before the art was even photographed for the box art.
|
|
A few details...
|
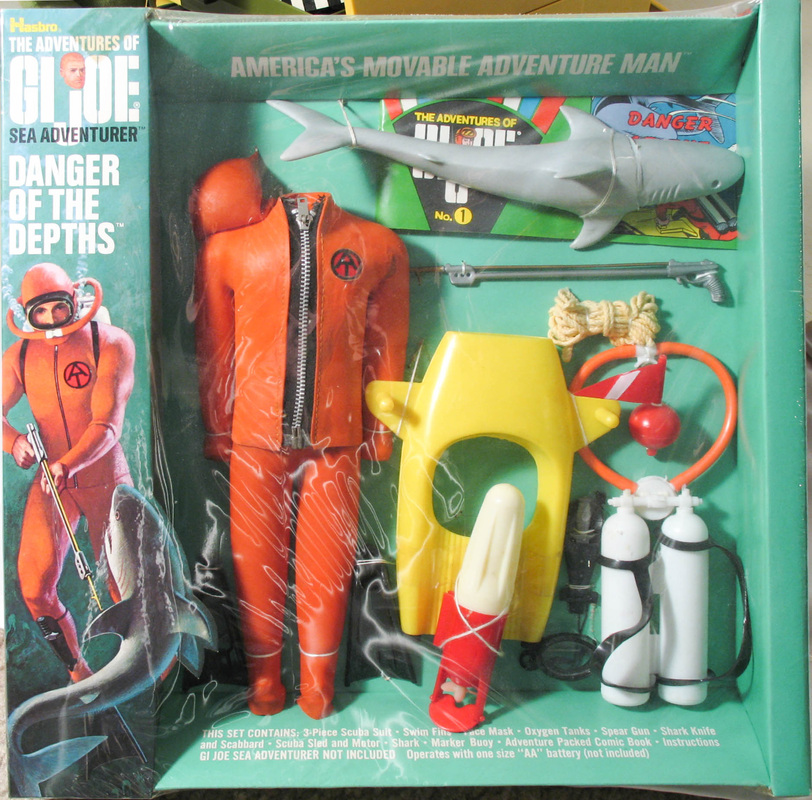
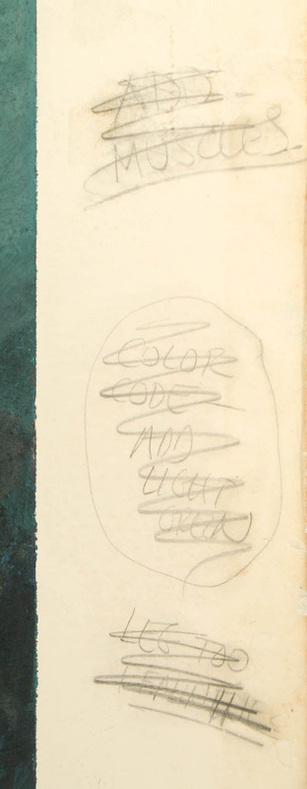
The illustration as shown on the side of the Sea Adventurer box, left and on the adventure set box below. Note the more muscular physique on the set box, and compare that to the editorial note in the margin of the painting (below) requesting the artist "add muscles" and the statement "leg too feminine," the last thing anyone wanted on a boy's toy. I believe that the art on the side of the Sea Adventure box (left) is the original version of the image that was revised for the boxed set (below). Note the lack of muscle and 'feminine' leg on the SA box version.
|
|
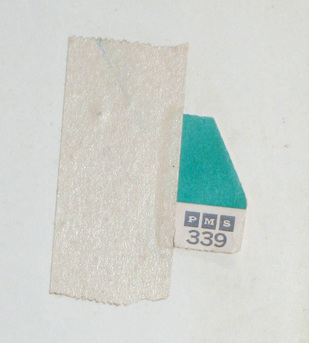
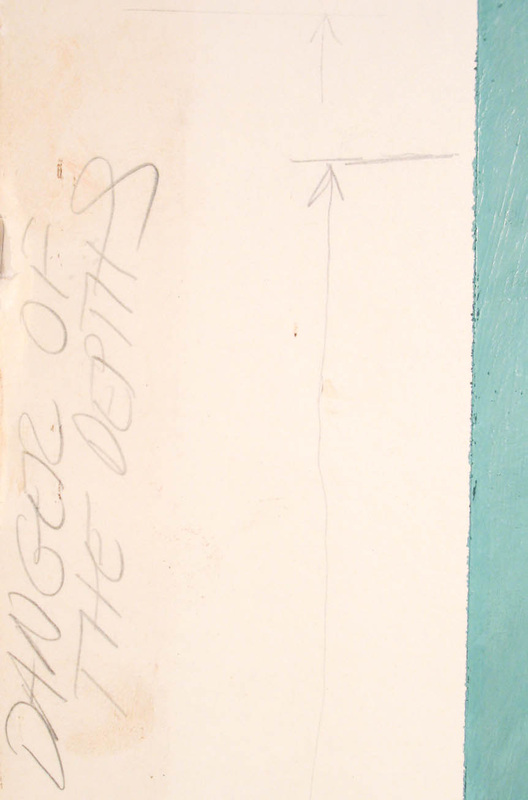
Left, a taped on chit of basic shade for the background color of the packaging. Below, editorial notes to "add muscles," "color code add light green" and "leg too feminine."
|
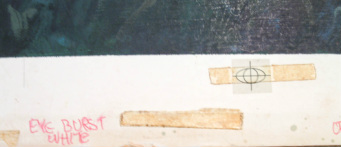
The notation "eye burst white" in red felt tip ink may refer to the color of the text on the window box, or be a later notation about Mike Power's atomic eye from when the box was used later for the Dive to Danger set.
The Restoration
Whether to restore a piece or leave it original is a tough call. In the case of the DotD art, I left it alone for many years, but feared that the open edges of the top paint layer where the chipping had taken place could lead to more loosening of paint and further deterioration. It seemed sensible that careful consolidation of the losses and the necessary in-painting would return the art to its full visual impact and preserve the work.
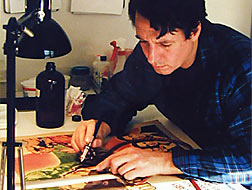
Brian Anthony at work on a vintage movie poster
|
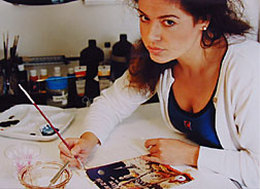
Kim Anthony at work in-painting loss on a book jacket
|
Based on the great repairs they did on two Special Value boxes that they fixed up for me (see a description of that job here) I contacted Brian and Kim Anthony at Anthony Restorations to do the job. Kim did a careful assessment of the art's current state that revealed the work was done in mixed media, including oil, gouache, and watercolors. That combination led to the poor adhesion of the black and the chipping.
The amount of soluble water based media meant that surface cleaning by other than dry methods was impossible, and that any deacidifcation of the inexpensive illustration board on which it was painted would have to be done from the back. Because of her concern that working with wet media could potentially leave tide lines in the image, she opted to replace lost color by carefully dry brushing it in. The process tends to wear out brushes, but avoids any excess liquid with the pigment that could soak into adjoining areas. I sent her close-up images of the art as printed to use a guide in restoration. We discussed whether to leave out the chips that show up in the art as initially printed, but I opted to have them painted in with the logic that it was the artist's original intention and that it wouldn't leave any open edges that could start future chips.
Below, take a look at some before and after images of the art. I am very pleased with the completed job, and once again recommend contacting the Anthony's with any work of this sort you might need done. Note the before and after pictures were taken in different light, the tone of the colors is actually the same, the photos make it look a bit different.
Before
|
After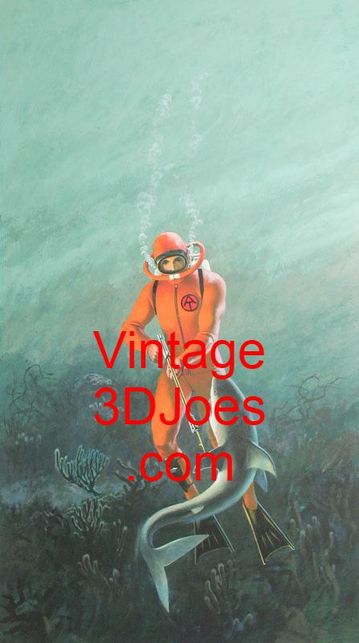


|
The restored art alongside the boxed set.